2020/12/30 - [React] - [React] 프로젝트 생성하고 실행하기-떽떽대는 개발공부
[React] 프로젝트 생성하고 실행하기-떽떽대는 개발공부
리액트 프로젝트 생성 및 실행 방법 프로젝트 생성 프로젝트 생성 명령 설치하기 npm install -g create-react-app 위 명령으로 리액트 프로젝트를 생성하는 create-react-app명령을 설치했다. -g옵션이 주어
ddeck.tistory.com
상기 글에서 리액트 프로젝트를 생성하는 방법을 포스팅 했다.
실제 프로젝트 작업을 하기 위해 상기의 생성 프로젝트에서 수정해야 할 사항이 보이는데
이 부분을 보다 웹팩을 이용하여 직접 프로젝트 개발 환경 구성하는 법에 대해 알아보았다.
먼저 프로젝트를 생성할 디렉토리를 열어준다.
터미널을 열고 초기화를 해주면 package.json 파일이 생성된다.
npm init -y
필요한 라이브러리를 설치한다.
npm i -D @babel/core @babel/preset-env @babel/preset-react babel-loader clean-webpack-plugin css-loader html-loader html-webpack-plugin mini-css-extract-plugin node-sass react react-dom sass-loader style-loader webpack webpack-cli webpack-dev-server
설치가 끝난 후 package.json 의 devDependencies 에서 설치된 라이브러리들을 확인할 수 있다.
  "devDependencies": {
    "@babel/core": "^7.12.10",
    "@babel/preset-env": "^7.12.11",
    "@babel/preset-react": "^7.12.10",
    "babel-loader": "^8.2.2",
    "clean-webpack-plugin": "^3.0.0",
    "css-loader": "^5.0.1",
    "html-loader": "^1.3.2",
    "html-webpack-plugin": "^4.5.1",
    "mini-css-extract-plugin": "^1.3.4",
    "node-sass": "^5.0.0",
    "react": "^17.0.1",
    "react-dom": "^17.0.1",
    "sass-loader": "^10.1.1",
    "style-loader": "^2.0.0",
    "webpack": "^5.14.0",
    "webpack-cli": "^4.3.1",
    "webpack-dev-server": "^3.11.2"
  }
위의 라이브러리 중 웹팩 부분을 보면 서로 버전이 상이한데, 이렇게 되면 서버 구동 시 에러가 발생될 수 있다.
webpack-cli 를 uninstall 하고 webpack-dev-server와 버전을 맞추어 재설치 하도록 하겠다.
npm uninstall -D webpack-clinpm install -D webpack-cli@3
최상위 디렉토리에서 src 디렉토리를 생성하고 index.html 파일을 작성해준다.
<!DOCTYPE html>
<html lang="kr">
  <head>
    <meta charset="utf-8" />
    <title>study_webpack</title>
  </head>
  <body>
    <div id="app"></div>
  </body>
</html>
이제 id="app"에 들어갈 내용은 js파일로 render 해줄 것이다.
src 디렉토리에 index.js 파일을 작성해준다.
import React from "react";
import ReactDOM from "react-dom";
import App from "./components/App";

ReactDOM.render(<App />, document.getElementById("app"));
위와 같이 index.html 에 들어갈 내용에 App 컴포넌트로 render 할 수 있도록 적용했다.
이제 src/components 디렉토리를 생성하고 App.js 컴포넌트를 작성해주자.
import React from 'react';

const App = () => {
  return (
    <h3>Hello, React</h3>
  );
};

export default App;
최상위 디렉토리에서 .babelrc 파일을 생성하고 아래와 같이 입력해준다.
바벨은 ES6에서 ES5로 자바스크립트를 변환해주는 역할을 해준다.
{
  "presets": ["@babel/preset-env", "@babel/preset-react"]
}
package.json 에서 script: build 부분을 추가한다.
{
  "name": "study_webpack",
  "version": "1.0.0",
  "description": "",
  "main": "index.js",
  "scripts": {
    "test": "echo \"Error: no test specified\" && exit 1",
    "build": "webpack",
    "start": "webpack-dev-server"
  },
  "keywords": [],
  "author": "",
  "license": "ISC",
  "devDependencies": {
    "@babel/core": "^7.12.10",
    "@babel/preset-env": "^7.12.11",
    "@babel/preset-react": "^7.12.10",
    "babel-loader": "^8.2.2",
    "clean-webpack-plugin": "^3.0.0",
    "css-loader": "^5.0.1",
    "html-loader": "^1.3.2",
    "html-webpack-plugin": "^4.5.1",
    "mini-css-extract-plugin": "^1.3.4",
    "node-sass": "^5.0.0",
    "react": "^17.0.1",
    "react-dom": "^17.0.1",
    "sass-loader": "^10.1.1",
    "style-loader": "^2.0.0",
    "webpack": "^5.14.0",
    "webpack-cli": "^3.3.12",
    "webpack-dev-server": "^3.11.2"
  }
}
build 시에 webpack 에서 처리하고 start 시에는 webpack-dev-server 에서 처리하도록 했다.
처리할 수 있도록 최상위 디렉토리에 webpack.config.js 파일을 생성한다.
const path = require("path");

module.exports = {
  entry: "./src/index.js",
  output: {
    filename: "bundle.js",
    path: path.resolve(__dirname + "/build")
  },
  mode: "development",
  module: {
    rules: [
      {
        test: /\.(js|jsx)$/,
        exclude: "/node_modules",
        use: ['babel-loader'],
      }
    ]
  }
};
entry 는 build 가 처음 시작되는 파일을 설정해준다.
react 에서는 js 기준으로 보기 때문에 index.js 파일로 넣어주었다.
output 은 빌드 된 파일을 설정하는 곳이다.
동일 디렉토리에 build 디렉토리를 생성하고 빌드된 번들을 bundle.js 라는 이름으로 저장할 수 있도록 했다.
index.js 파일은 babel-loader 를 이용하여 가져와서 처리한다.
가장 처음 빌드 될 index.html 은 .html 파일이므로 아래와 같이 설정이 필요하다.
const path = require("path");
const HtmlWebPackPlugin = require("html-webpack-plugin");

module.exports = {
  entry: "./src/test.js",
  output: {
    filename: "bundle.js",
    path: path.resolve(__dirname + "/build")
  },
  mode: "development",
  module: {
    rules: [
      {
        test: /\.html$/,
        use: [
          {
            loader: "html-loader",
            options: { minimize: true }
          }
        ]
      }
    ]
  },
  plugins: [
    new HtmlWebPackPlugin({
		template: './src/index.html',
        filename: 'index.html'
    })
  ]
};
src 폴더에 있는 index.html 파일은 "html-loader"로 불러온 후 빌드한다.
빌드한 파일을 index.html 이라는 이름으로 build 디렉토리에 생성해줄 것이다.
options로 minimize 를 주어 코드 최적화 시켜주어 생성될 번들 코드가 한줄로 나타난다.
이제 웹팩에서 서버를 지정해주어 구동을 해보도록 해보자.
const path = require("path");
const HtmlWebPackPlugin = require("html-webpack-plugin");

module.exports = {
  entry: "./src/index.js",
  output: {
    filename: "bundle.js",
    path: path.resolve(__dirname + "/build")
  },
  devServer: {
    contentBase: path.resolve("./build"),
    index: "index.html",
    port: 3000
  },
  mode: "development",
  module: {
    rules: [
      {
        test: /\.(js|jsx)$/,
        exclude: "/node_modules",
        use: ['babel-loader'],
      },
      {
        test: /\.html$/,
        use: [
          {
            loader: "html-loader",
            options: { minimize: true }
          }
        ]
      }
    ]
  },
  plugins: [
    new HtmlWebPackPlugin({
      template: './src/index.html',
      filename: 'index.html'
    })
  ]
};
웹팩에서 devServer 로 서버 구동에 필요한 정보를 알려주었다.
빌드 된 번들의 경로를 알려주고 포트를 지정하였다.
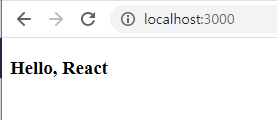
이제 npm start 를 실행하고 브라우저 http://localhost:3000 에 접속하면 빌드된 결과가 나올 것이다.
'React' 카테고리의 다른 글
| [React] react, redux 를 사용하여 게시판 만들기 - 떽떽대는 개발공부 (1) | 2021.01.19 |
|---|---|
| [React] 절대경로를 사용하여 css 적용하기 - 떽떽대는 개발공부 (0) | 2021.01.15 |
| [React] react-dom 과 css animation 을 이용하여 loading 중 아이콘 구현하기 - 떽떽대는 개발공부 (0) | 2021.01.12 |
| [React] ReactDOM 을 사용하여 팝업창 띄우기 - 떽떽대는 개발공부 (0) | 2021.01.11 |
| [React] a태그 onClick 이벤트 render 에러 해결 - 떽떽대는 개발공부 (0) | 2021.01.07 |


댓글